Published: 24.03.2026
See moreUser Manual For Kosmen KM-66E Ceiling-Mounted Dehumidifier
 Kosmen Đà Nẵng
 Published:
02/08/2025, 08:40
- Updated at 02/08/2025, 10:04
Published:
02/08/2025, 08:40
- Updated at 02/08/2025, 10:04Detailed User Manual for the Kosmen KM-66E Ceiling-Mounted Dehumidifier!
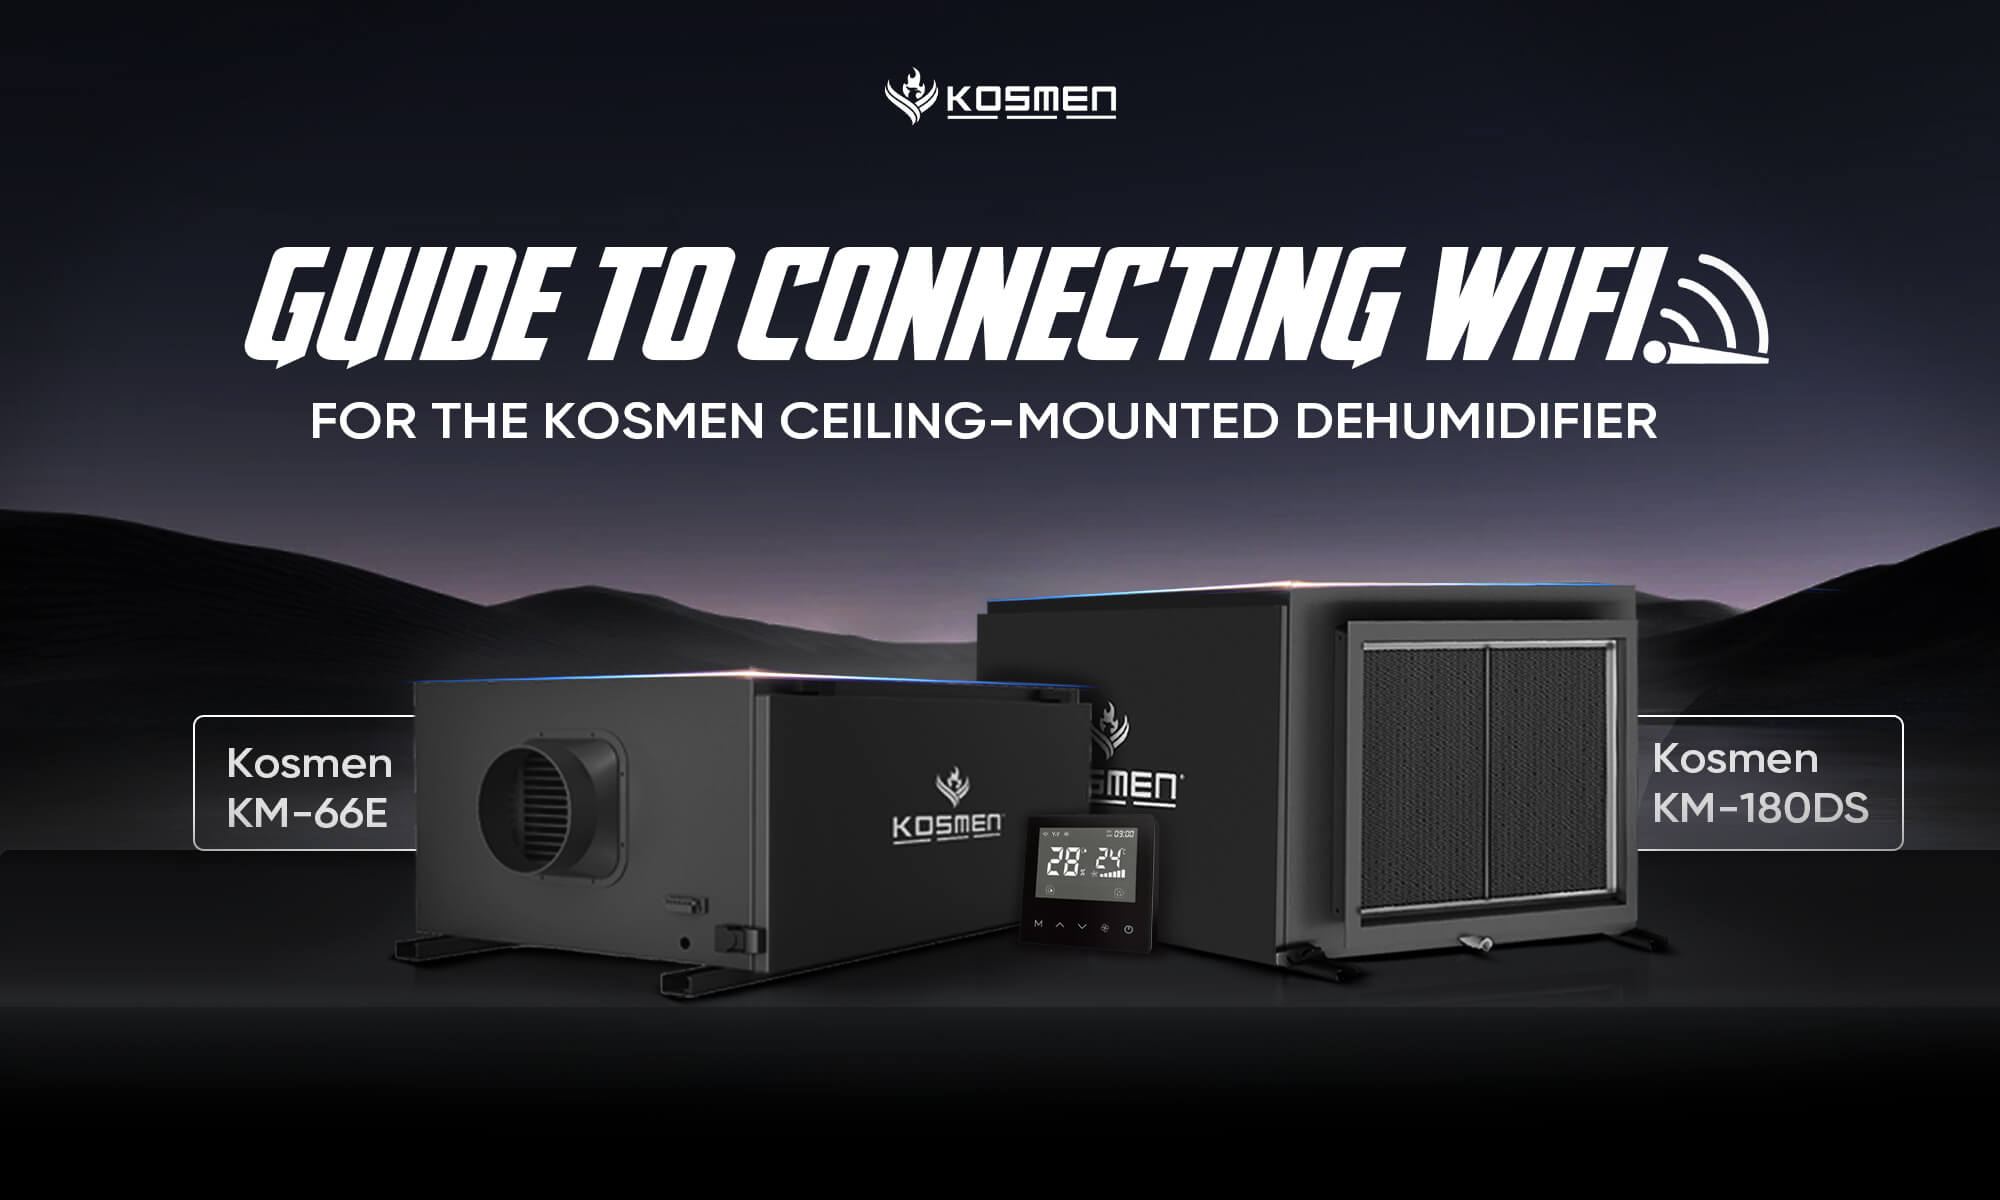
User Manual for Kosmen KM-66E Ceiling-Mounted Dehumidifier
Product Features
Dehumidification
Controls humidity in large spaces, prevents mold and mildew, and protects electronic devices, machinery, and stored materials. Dehumidification capacity: 66 liters/day, suitable for areas from 60 – 80㎡ (with a ceiling height of 2.8m).
Timer
Allows you to set the operating time for turning the unit ON and OFF, helping to save energy and easily manage the operating schedule.
Automatic Defrost
When the sensor detects frost on the cooling coil, the machine will automatically stop to defrost and will restart once defrosting is completed.
Memory Function
In case of a power outage, the device will automatically remember its previous operating status and resume operation when power is restored within 72 hours.
Note: Turn off the power when not in use to save electricity and ensure safety.
User Manual for Kosmen KM-66E Ceiling-Mounted Dehumidifier
Overload Protection
When an electrical overload is detected in the system, the unit will automatically shut down to protect the internal components.
Operating Instructions
Power Button
Press this button to turn the unit ON or OFF.
Mode Button
When the unit is ON, press this button to switch between two modes:
- Ventilation Mode: Only the fan runs, no dehumidification.
- Dehumidification Mode: Activates both the fan and the compressor to dehumidify.
Press and hold this button for 5 seconds to enter the clock setting mode. In clock setting mode, press once to move through the setup steps in the following order:
- Set current time (hour, minute)
- Set timer start time (hour)
- Set timer start time (minute)
- Set timer stop time (hour)
- Set timer stop time (minute)
After finishing, if no further action is taken within 5 seconds, the machine will automatically save and exit the settings.
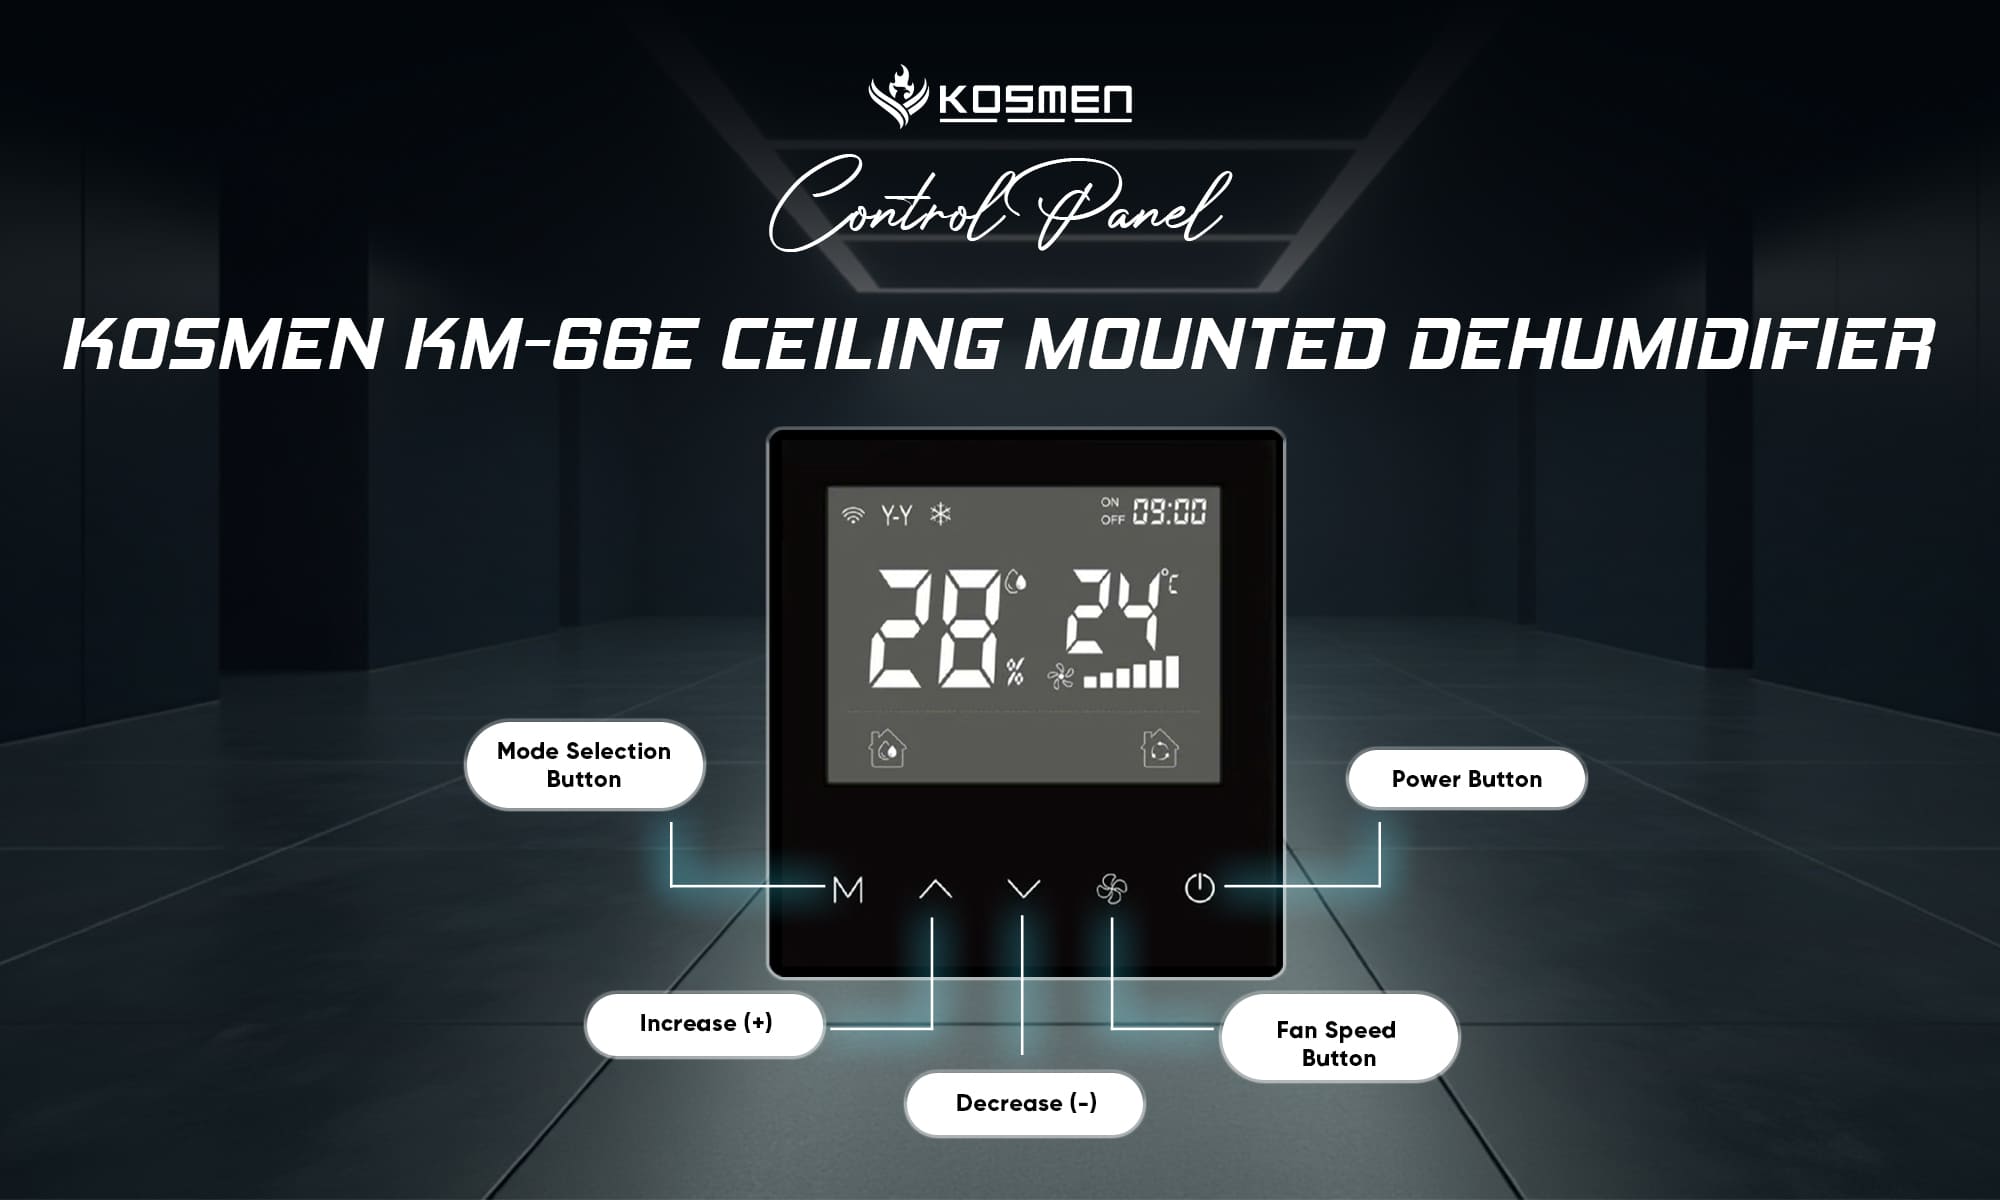
Control Panel of the Kosmen KM-66E Ceiling-Mounted Dehumidifier
“+” Button
When setting the clock or humidity, press this button to increase the value.
“–” Button
When setting the clock or humidity, press this button to decrease the value.
Fan Button
- Press this button to switch between high and low fan speeds.
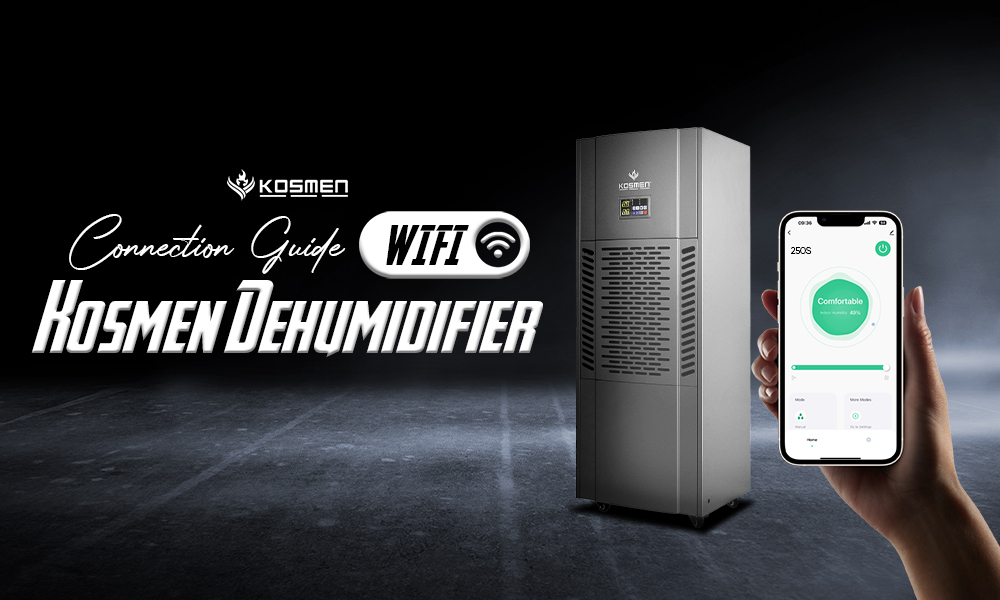
- Press and hold this button for 5 seconds to enter WiFi connection setup mode.
- In WiFi mode, the device will automatically search for available WiFi networks.
WiFi Connection Guide
To control the unit remotely via your smartphone, follow these steps:
- Step 1: Download the “Tuya Smart” app on your smartphone.
- Step 2: Register or log into your Tuya Smart account.
- Step 3: Follow the instructions in the app to put the device into pairing mode.
Notes:
- Place the dehumidifier, smartphone, and WiFi router close to each other during the connection process.
- Ensure that the WiFi network is stable and the password is correct.
- The device only supports 2.4GHz WiFi networks and does not support 5GHz.
Operating Guide
Ventilation Mode
- When selecting ventilation mode, only the fan will operate, and the compressor will not run. In this mode, the dehumidification function is disabled.
- This mode helps circulate air in the room without changing the humidity level.
Dehumidification Mode
- When selecting dehumidification mode, the display will indicate that this mode is active.
- If the room humidity is greater than or equal to the set humidity + 5%, the compressor will start operating to remove moisture.
- When the set humidity is 5% higher than the actual room humidity, the compressor will automatically stop, but the fan will continue to run to keep the air circulating.
- The fan always operates continuously to ensure even air circulation in the room whenever the device is turned on.
Automatic Defrost
- When the compressor operates continuously for 25 minutes and the evaporator coil temperature falls to –1°C or below for 30 seconds, the unit will automatically activate defrost mode.
- During defrosting, the compressor will pause while the fan continues to run, helping to melt any frost or ice.
Defrost mode will end when either: - The defrosting period reaches 8 minutes, or The evaporator coil temperature rises to 7°C or higher for 30 seconds. After that, the unit will return to normal dehumidification mode.
- If the evaporator coil encounters an error or damage, the unit will automatically repeat the cycle:
25 minutes of dehumidification → 8 minutes of defrosting → continue operation.
Memory Function
- In the event of a sudden power outage, the device will automatically remember the last selected settings and modes.
- When power is restored, the unit will resume operation with the previous settings without requiring manual reconfiguration.
Maintenance and Repair Instructions
Air Filter Maintenance
The unit is equipped with an independent air filtration system, with the filter installed at the air intake to clean the return airflow before it enters the machine.
Important Notes:
- Never operate the unit without the air filter. Doing so may allow dust and debris to enter the equipment, reducing dehumidification efficiency and causing frequent compressor defrost cycles.
- Inspect the air filter at least once a month. Depending on the air quality in the installation area, adjust the cleaning or replacement schedule accordingly.
Motor Maintenance
The machine's motor uses pre-lubricated bearings and is designed for low-maintenance operation. However, to ensure stable performance, it is recommended to perform a periodic inspection once a year to detect any early signs of abnormal operation.
Safety Precautions Before Inspection and Troubleshooting
- High voltage is present inside the unit. Always disconnect the power supply before performing any inspection or repair.
- The unit contains heat-generating components (compressor) that must be allowed to cool completely before performing maintenance.
- All inspections, adjustments, or repairs should be carried out by qualified technicians to ensure safety and prevent accidental contact with live components or hot parts.
Periodic Inspection and Maintenance
Component | Inspection & Maintenance Tasks | Every 3–6 Months | Every 12 Months |
Air Filter | Clean and replace when necessary | Clean the filter and replace if necessary | Clean the filter and replace if it is dirty or clogged |
Compressor | Check operation and electrical wiring | Check that the compressor operates normally and runs smoothly without abnormal vibration | Inspect the compressor wiring to ensure connections are secure; check for damage or overheating |
Condenser | Clean | Remove surface dust and debris | Clean debris and dirt from the surface and base of the heat exchanger |
Defrost Valve | Inspect | — | Check for signs of overheating or blockage. Replace if defective |
Seals | Inspect for damage or displacement | Check for damage or displacement; replace if necessary | Inspect for damage or wear; replace if worn or defective |
Important Notes – Read Carefully Before Use
Electrical Installation
Note: Electrical connections must be performed by a qualified technician in compliance with local electrical standards.
- The unit operates on a single-phase AC power supply. Verify that the voltage and frequency match the specifications listed on the machine.
- The power supply must be equipped with a leakage protection device, properly grounded, and connected through an isolation switch for maintenance purposes.
- Fuses and power cables must be rated to match the unit’s power requirements.
- Ensure that the input voltage does not exceed ±10% of the rated value indicated on the unit, especially when the electrical system is heavily loaded.
Choosing an Installation Location
To ensure optimal performance and ease of maintenance:
- The unit should be installed indoors, away from areas with excessive humidity or temperatures below the dew point.
- Leave sufficient clearance behind the unit to facilitate routine inspection and maintenance.
- Install the unit close to a power outlet for easy connection.
- Avoid installing the unit in locations where airflow may be obstructed or where cleaning is difficult.
- The dehumidifier must be installed perfectly level. Use a spirit level to check for balance. This prevents condensate from overflowing, which can affect performance and the surrounding environment.
Installation Clearance
When installing and operating the machine, make sure there is enough clearance around the unit to avoid affecting its performance and to make maintenance easier.
To ensure efficient operation, proper airflow circulation, and convenient maintenance, observe the following clearances during installation:
- Machine body width: 85 cm
- Minimum distance from walls or other equipment on both sides: 50 cm
Notes for Using the Kosmen KM-66E Ceiling-Mounted Dehumidifier
Air Duct Connection
When connecting to air ducts:
- Follow ISO 7807 standards regarding duct dimensions and design.
- Ensure all duct connections are airtight, especially at rigid (galvanized) duct joints.
- Insulate the ductwork to prevent condensation and energy loss.
- Minimize duct length to reduce pressure loss.
- The air intake must be placed high and away from sources of pollution such as dust, steam, or toxic gases.
- The outlet duct should be supported independently to avoid putting pressure on the unit.
- The unit can be installed directly in the room requiring dehumidification or in a separate technical room.
- The fan outlet should be equipped with a diffuser to ensure efficient air distribution.
External Sensor Connection
The unit can be connected to an external control system through the pre-installed wiring.
Important notes when installing a humidity detector:
- Position it away from abnormal airflows (not near windows, water sources, heaters, or direct sunlight).
- Install at a height of 1–1.5 m for accurate humidity measurement.
- Avoid locations that are excessively dry or humid, as this can cause inaccurate readings.
- The external control system must be compatible with the low-voltage circuit of the unit.
Compliance and Safety Guidelines
- Do not use flammable chemicals or spray water on the unit.
- Do not place the unit in areas prone to excessive moisture or flooding.
- Never operate the unit without the air filter installed. Missing filters may cause dirt or corrosion on the heat exchanger, reduce dehumidification efficiency, or severely damage the unit.
- Do not remove or alter labels and technical information on the unit.
- Use only genuine replacement parts designed and manufactured by Kosmen.
- Only qualified personnel are allowed to operate or maintain the unit.
- Electrical components must only be serviced by certified electrical technicians.
- Do not install the unit in areas that require explosion-proof equipment.
- Always disconnect power before opening any maintenance panels.
- After stopping the unit, allow it to cool for at least 15 minutes before performing maintenance.
- If no maintenance is being carried out, the maintenance panel must remain securely closed.
Humidity Control Range
The unit operates effectively in environments with humidity levels up to 100% RH and ambient temperatures from 5°C to 38°C.
Error Code Explanation
Error Code | Issue | Solution |
E1 | Temperature sensor fault | Replace the sensor |
E2 | Humidity sensor fault | Replace the sensor |
E4 | Low voltage protection | Check refrigerant pressure |
E6 | Phase sequence error or missing phase (for 380V only) | Swap phase sequence |
Troubleshooting
Problem | Possible Cause | Solution |
Dehumidifier does not work | 1. Power outage. 2. Power switch not turned on. 3. Blown fuse. 4. Unit previously set with a timer to turn off. 5. Water tank is full or not installed properly, water indicator is flashing. | 1. Wait for power to be restored. 2. Turn on the power switch. 3. Replace the fuse. 4. Cancel or wait for the timer to finish. 5. Empty the water tank and reinstall it properly. |
Dehumidification is not effective | 1. Incorrect humidity setting. 2. Air inlet or outlet is blocked. 3. Insufficient operating time. 4. Doors or windows are open. 5. Ambient temperature is < 5℃ or > 38℃. | 1. Adjust to a suitable humidity level. 2. Clean and remove obstructions. 3. Extend the operating time. 4. Keep doors and windows closed. 5. Operate within 5–38℃ temperature range. |
Water leakage | 1. Drain hose is not connected securely. 2. Drainage system is clogged. 3. Water tank is not installed properly. | 1. Reconnect the drain hose securely. 2. Clean the drainage system. 3. Reinstall the water tank correctly. |
Loud noise during operation | 1. Unit is placed on an uneven surface. 2. Filter is dirty. 3. Loose screws. | 1. Place the unit on a level surface. 2. Clean the filter. 3. Tighten all screws. |
If the above errors cannot be resolved and maintenance is required, please contact Kosmen or an authorized dealer. Do not disassemble the machine for maintenance without permission.
When the dehumidifier is running or has just stopped, you may hear sounds from the refrigeration cycle. This is normal and not a malfunction.
Technical Specifications – Kosmen KM-66E Ceiling-Mounted Dehumidifier
Specification | Details |
Dehumidifying Capacity | 66 liters/day (30℃, 80% RH) |
Power Supply | 220V~50Hz, Single Phase |
Power Consumption | 1180 W |
Airflow | 500 m³/h |
Rated Current | 5.65 A |
Compressor | Panasonic |
Refrigerant | R410A |
Applicable Area | 60 – 80 ㎡ (ceiling height 2.8 m) |
Air Inlet Size | 147.6 mm |
Air Outlet Size | 147.6 mm |
Noise Level | ≤ 52 dB(A) |
Operating Environment | 5 – 38 ℃, 10% – 90% RH |
Product Dimensions | 840 × 480 × 350 mm |
Package Dimensions | 900 × 540 × 490 mm |
Net Weight | 38 kg |
Gross Weight | 51.5 kg |
Origin / Manufacture | China |
Share the article


Related news