Published: 24.03.2026
See moreUser Manual For Kosmen KM-480DS Ceiling-Mounted Dehumidifier
 Kosmen Đà Nẵng
 Published:
12/08/2025, 15:00
- Updated at 12/08/2025, 15:12
Published:
12/08/2025, 15:00
- Updated at 12/08/2025, 15:12Below is the detailed user manual for the Kosmen KM-480DS ceiling-mounted dehumidifier, check it out now!
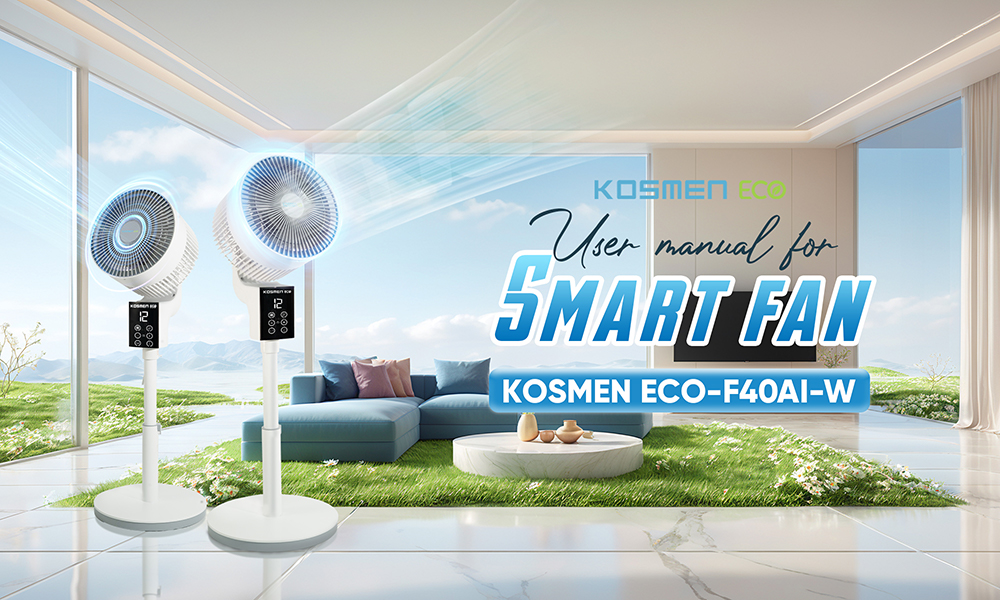
User Manual for Kosmen KM-480DS Ceiling-Mounted Dehumidifier
Product Functions
Dehumidification
Controls humidity in large spaces, prevents mold and mildew, and protects electronic devices, machinery, and stored materials. Dehumidification capacity of 480 liters/day, suitable for areas from 400 – 700 m² (ceiling height 2.8 m).
Timing
Allows setting the operating start and stop times, helping save energy and easily manage the operation schedule.
Automatic Defrost
When the sensor detects frost on the evaporator coil, the machine will automatically stop to defrost and will restart automatically after completion.
Memory Function
In case of a power outage, the device will automatically remember the previous operating state and resume operation when power is restored within 72 hours.
Note: Turn off the power when not in use to save electricity and ensure safety.
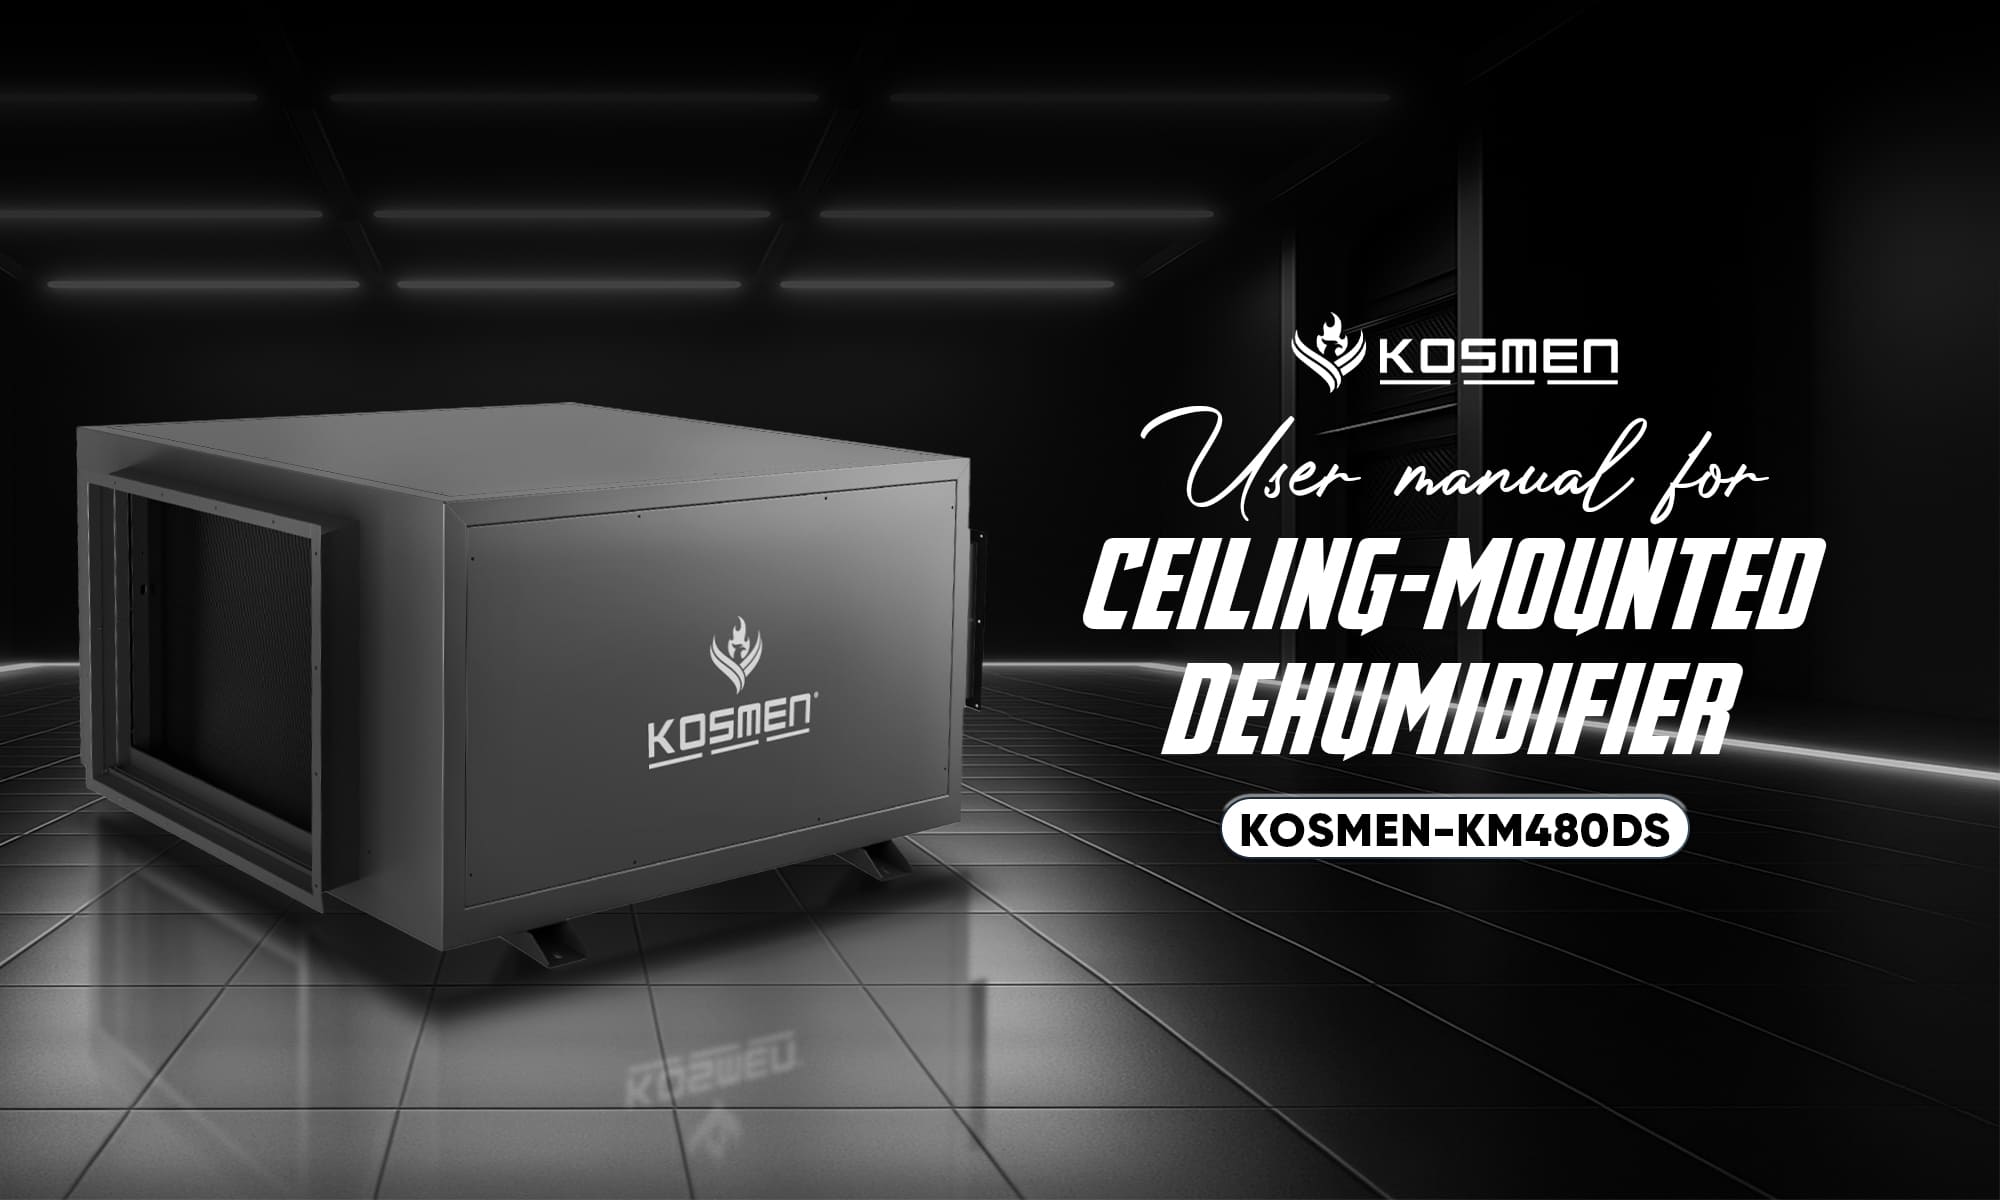
Kosmen KM-480DS Ceiling-Mounted Dehumidifier User Manual
Overload Protection
When an electrical overload is detected in the system, the device will automatically shut down to protect internal components.
Operating Instructions
Power Button
Press this button to turn the machine on or off.
Mode Button
When the machine is on, press this button to switch between two modes:
- Ventilation Mode: Runs the fan only, without dehumidification.
- Dehumidification Mode: Activates both the fan and compressor for dehumidification.
Press and hold this button for 5 seconds to enter the clock setting mode. In clock setting mode, press once to cycle through the setup steps in the following order:
- Set the current time (hour, minute)
- Set the timer start hour
- Set the timer start minute
- Set the timer stop hour
- Set the timer stop minute
After completing the selection, if there is no further operation within 5 seconds, the machine will automatically save the settings and exit the setup mode.
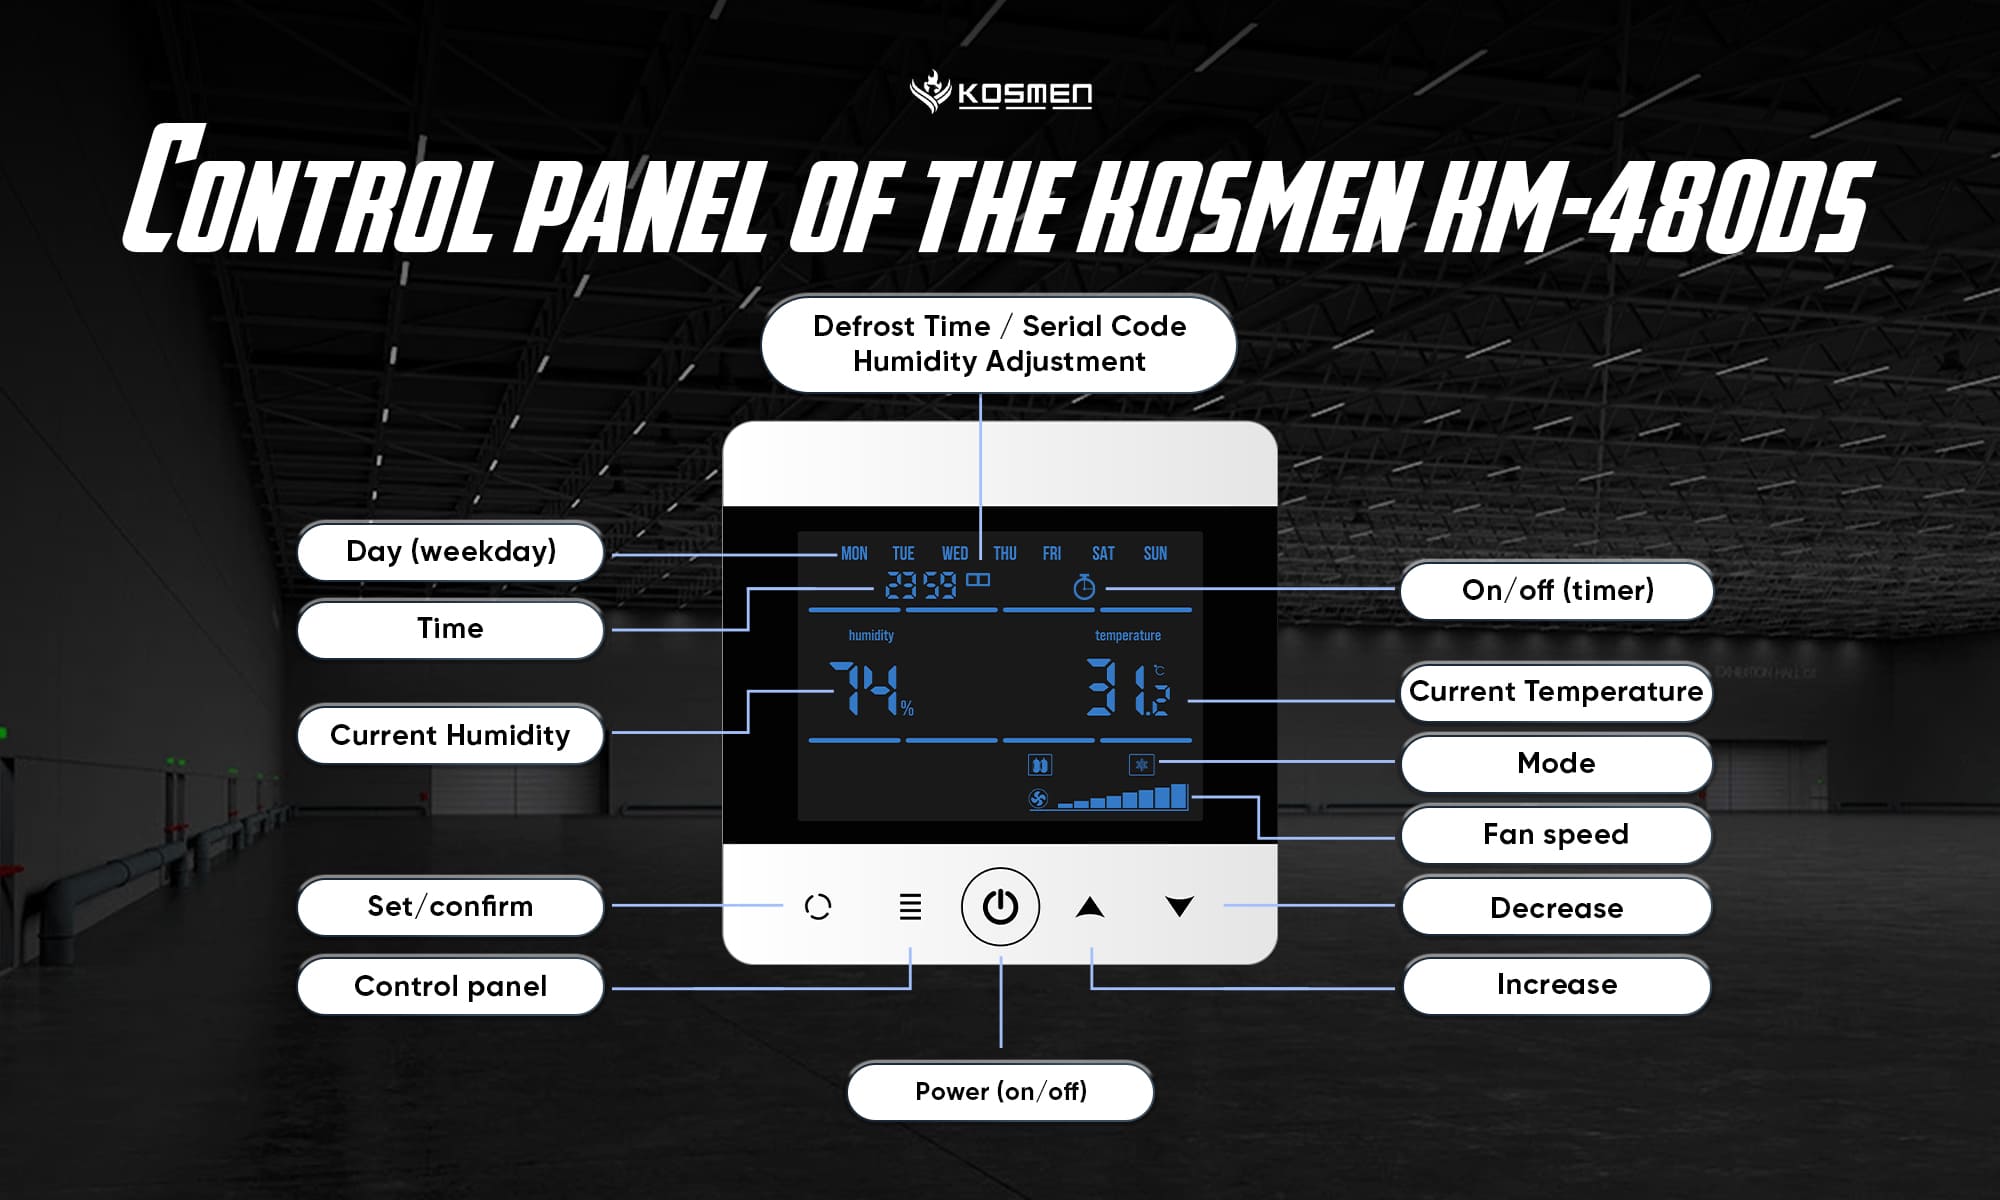
Control Panel Of The Kosmen KM-480DS Ceiling-Mounted Dehumidifier
Control Panel: Opens the interface for controlling functions.
Increase Button (+)
When setting the clock or humidity level, press this button to increase the value. Each press increases the set humidity by 1%.
Decrease Button (–)
When setting the clock or humidity level, press this button to decrease the value. Each press decreases the set humidity by 1%.
Set/Confirm Button
Used to configure and confirm changes.
Control Panel Instructions
Indicators Displayed on the Screen:
- Day: Displays the day of the week (MON, TUE, WED, THU, FRI, SAT, SUN).
- Time: Displays the current time (in 12:00 format).
- Current Humidity: Shows the measured percentage of air humidity.
- Current Temperature: Displays the ambient temperature (°C).
- Valve: Valve operation icon (if applicable).
- Lock: Displays when the control panel is locked to prevent accidental operation.
- Compressor Working: Indicates when the compressor is running.
- Dehumidification Mode: Displays when the unit is operating in dehumidification mode.
- Fan Mode: Indicates the fan’s operating mode.
- Fan Speed: Displays the current fan speed level.
- On/Off Time: Shows the timer setting for starting or stopping the machine.
- Defrost Time / Humidity Adjustment / Serial Number: The line displays system information and special settings.
Operating Instructions
General Operating Guide
Turn the Machine On/Off
Press the power button to turn the device on or off.
Select Operating Mode
Press the control panel button to switch to dehumidification mode.
- Ventilation Mode: Runs the fan only, without dehumidification.
- Dehumidification Mode: Activates both the fan and the compressor for dehumidification.
Set Operating Humidity
- Set the desired humidity value using the increase or decrease buttons after the machine is turned on.
- After setting, you can either press the set/confirm button or leave it idle for 10 seconds; the system will automatically save the value and start operation.
RS485 Connection
The device is equipped with an RS485 connection port, in which:
- The wire marked with a symbol on the plug is the positive pole (+)
- The remaining wire is the negative pole (–)
Detailed Control Instructions
1. Fan Speed Control
The fan speed is manually set via the control panel. When the device is turned on:
- The fan and valve will operate first.
- Then the compressor will start running.
- The default fan speed is low, but the user can adjust it as needed.
2. Compressor Control
If the set humidity > 10% and the humidity sensor is functioning normally:
- When the actual humidity is greater than or equal to +3% of the set value, the compressor will automatically turn on.
- When the actual humidity is less than or equal to +1% of the set value, the compressor will automatically turn off.
- If the set humidity = 10% or the humidity sensor fails, the device will switch to continuous dehumidification mode, with the compressor running non-stop.
3. Defrost Mode Control
There are two defrost modes: Automatic and Timer-based.
a) Automatic Defrost (if defrost time setting = 0):
When the compressor runs continuously for 20 minutes and the coil temperature is < –2°C for 5 consecutive minutes, the unit will switch to defrost mode.
In this mode:
- The compressor turns off.
- The compressor icon flashes.
The defrost phase ends when:
- Defrost time > 10 minutes and
- Coil temperature ≥ 3°C for 1 consecutive minute.
If the coil temperature sensor fails, the compressor will:
- Run for 30 minutes.
- Then turn off for 8 minutes to defrost.
b) Timer-based Defrost (if defrost time setting > 0):
- When the compressor runs continuously for ≥ the set P1 time, the unit will enter the defrost phase.
- After the compressor’s inactive time ≥ the set P2 time, the unit will resume normal operation and end the defrost phase.
Note: Defrost mode takes priority over normal dehumidification mode.
4. Low Voltage or Phase Sequence Protection
When a low voltage or phase sequence fault occurs: All output devices stop operating.
The display will show the warning icons:
- E5: Low voltage warning.
- E8: Phase sequence error warning.
5. High Temperature Protection
- If the indoor temperature ≤ 41°C: The compressor operates normally.
- If the indoor temperature ≥ 43°C: The compressor will shut down.
- The fan will turn off after 3 minutes. The valve will close.
6. Notes for Long Periods of Non-Use
Please unplug the power cord or disconnect the power supply to ensure safety and save energy.
Detailed Setup Instructions
1. Turn the Controller On/Off
After connecting the power supply correctly, the LCD screen will display the OFF status.
Press the power button to turn on the device: The screen will display information such as indoor temperature and humidity.
Press the power button again to turn off the device.
2. Set the Operating Mode
When powered on, press the control panel button to switch between:
- Ventilation Mode
- Dehumidification Mode
In dehumidification mode, you can set the desired humidity by pressing the increase/decrease buttons. After 10 seconds of no operation or by pressing the set/confirm button, the device will automatically save the settings and return to the main interface.
3. Set the Time
When powered on, press and hold both the set/confirm and increase buttons for more than 3 seconds to enter the time setting mode.
Sequentially adjust by repeatedly pressing the control panel button: The blinking position will move in the order Day of the Week → Hour → Minute.
Use the increase/decrease buttons to change the values.
Press the set/confirm button to save and exit.
4. Set the Fan Speed
Press the set/confirm button to enter the fan speed setting interface.
Use the increase/decrease buttons to select the desired fan speed level.
Press the set/confirm button or leave idle for 10 seconds to save the setting.
Note: For this model, the airflow is fixed, and high and low fan speeds are the same, so no adjustment is necessary.
5. Set Defrost Time
Press and hold the set/confirm button for about 3 seconds to set the defrost time:
- Set compressor running time (P1)
- Then set compressor stop time (P2)
- Use the increase/decrease buttons to adjust, and the set/confirm button to confirm.
Note: If P1 time > 0, the unit will defrost according to the set time. Otherwise, it will use the automatic defrost mode.
6. Set Manual Valve Switch
Press and hold the control panel button for 3 seconds to turn the manual valve on/off.
The valve will automatically close if: The humidity sensor fails or humidity > 75%.
The valve will reopen when humidity < 60%.
Note: This feature has no effect if the unit does not have a configured valve.
7. Set Time
Press and hold both the set/confirm button and the decrease button for 3 seconds to enter the timer mode.
Use the increase/decrease buttons to set the time (0–24 hours).
Press the set/confirm button or wait 10 seconds to save the setting. The device will begin the countdown.
8. Set Humidity
In dehumidification mode, press the increase/decrease buttons to set the desired humidity percentage (%).
Press the set/confirm button or leave idle for 10 seconds to save
9. Humidity Calibration
Press and hold both the control panel button and the increase button for 3 seconds to enter calibration mode:
- Calibrate indoor humidity (displays serial number 1)
- Press again to switch to outdoor humidity calibration (serial number 2)
Use the increase/decrease buttons to adjust.
Note: The unit does not display outdoor humidity; this setting has no effect.
10. Set or Unlock Keyboard Lock
Press and hold both the set/confirm button and the control panel button for 3 seconds to enable/disable the keyboard lock mode. The lock icon will appear on the screen when activated.
11. Set and Reset Filter
Press and hold the decrease button for 3 seconds:
- If the filter warning is active, the system will reset the filter counter to 0 days.
- If the warning is not active, you can set the filter time (0–360 days, default: 42 days).
12. Check Filter and Coil Temperature
Press and hold both the increase and decrease buttons for 3 seconds to view:
- The accumulated days of filter usage
- Coil and tube temperatures
Press the set/confirm button to cycle through each piece of information. After 10 seconds of no operation, the unit will exit the mode.
13. Check Outdoor Temperature and Humidity
Press and hold both the set/confirm button and the [specific button name] for 3 seconds to enter the check mode.
The values will flash on the display. The unit will automatically exit after 10 seconds of no operation.
Note: This model does not support an outdoor sensor; this function is unavailable.
14. Turn Button Sound On/Off
Press and hold both the power button and the decrease button for 3 seconds to enable/disable the button sound.
The buzzer will beep “beep beep” if the change is successful.
15. Restore Factory Settings
Press and hold both the control panel button and the decrease button for 3 seconds to restore the factory configuration.
All icons will appear on the screen for a few seconds, then the unit will power off.
Restart to resume normal operation.
Maintenance and Repair Instructions
Filter Maintenance
The unit is equipped with an independent air filtration system, with the filter installed at the air inlet to process the return airflow before it enters the machine.
Important Note:
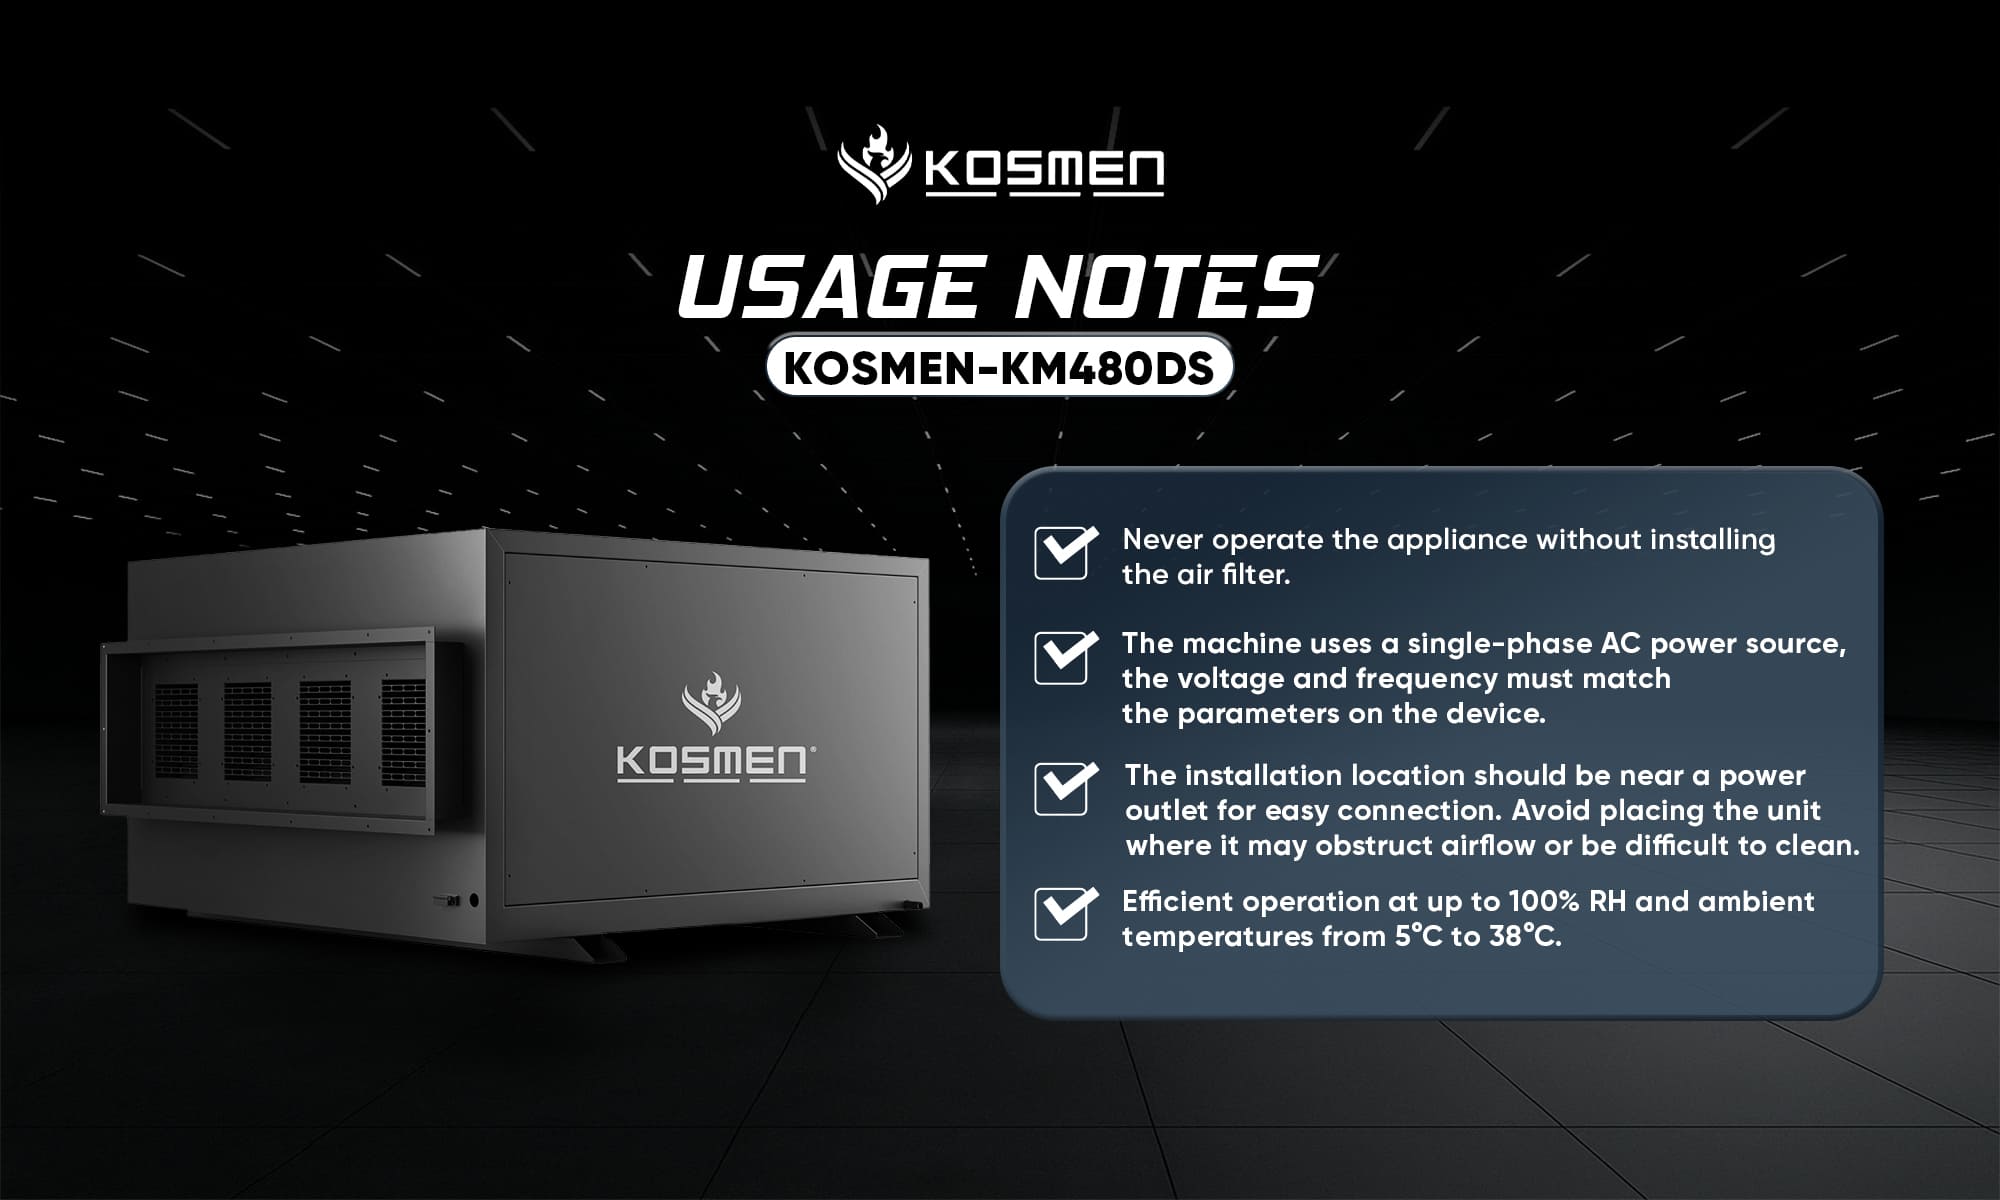
- Never operate the unit without the filter. Doing so may allow dust and impurities to enter the equipment, reduce dehumidification efficiency, and trigger frequent defrost cycles in the compressor.
- The filter should be inspected at least once a month. Depending on the air quality in the installation area, the cleaning or replacement interval can be adjusted accordingly.
Motor Maintenance
The motor is equipped with pre-lubricated bearings and is designed to require no frequent maintenance. However, to ensure stable operation, it is recommended to perform an annual inspection to detect any early signs of abnormality.
Safety Precautions Before Inspection and Troubleshooting:
- The unit contains high-voltage components. Always disconnect the power supply before performing any inspection or repair work.
- The device includes heat-generating parts (compressor) that require complete cooling before maintenance.
- Inspection, adjustment, or repair should be carried out by qualified technicians to ensure safety and avoid contact with components that may still carry electrical current or high temperatures.
Regular Inspection and Maintenance
Component | Inspection and Maintenance | Every 3–6 Months | Every 12 Months |
Filter | Clean, replace if necessary | Clean the filter and replace if dirty | |
Compressor | Check operation and wiring system | Check if the compressor operates normally with stable vibration | Inspect compressor wiring to ensure no loose connections; check for signs of damage and overheating |
Condenser | Clean | Remove debris and dust from the surface and bottom of the heat exchanger | |
Defrost Valve | Inspect | Check for signs of overheating or blockage. Replace if damaged | |
Seal | Inspect for damage or displacement | Check for signs of damage or displacement. Replace if damaged | Check for signs of damage or wear. Replace if worn |
Important Note – Read Carefully Before Use
Electrical Installation
Note: Electrical connection must be carried out by a qualified technician in accordance with local electrical standards.
Electrical Requirements:
- The unit uses single-phase AC power; voltage and frequency must match the specifications on the device.
- The device’s wiring is clearly color-coded to avoid confusion during connection.
The system must be equipped with:
- Leakage protection device (ELCB or RCCB).
- Isolation switch to ensure safety during maintenance.
- Proper fuse installed near the device.
Check the power supply before connection:
- Voltage fluctuation should not exceed ±10% of the rated value.
- Pay special attention if the area uses multiple high-power electrical devices.
- Grounding is mandatory to protect both the user and the equipment.
- Power cables and fuses must be compatible with the capacity of the dehumidifier.
Selecting the Installation Location
To ensure efficient operation and easy maintenance:
- The unit should be installed indoors, avoiding areas with excessively high humidity or temperatures lower than the dew point.
- Leave sufficient space behind the unit for convenient maintenance and periodic inspections.
- The installation site should be close to a power outlet for easy connection.
- Avoid installing the unit in locations that block airflow or make cleaning impossible.
- The dehumidifier must be installed perfectly level; use a spirit level to check balance. This helps prevent condensate water overflow, which could affect performance and the surrounding environment.
Notes When Using The Kosmen KM-480DS Ceiling-Mounted Dehumidifier
Air Duct Connection
When connecting to an air duct:
- Comply with ISO7807 standards for duct dimensions and design.
- Bolt length at the flange should not exceed 20 mm.
- Minimize duct length to reduce static pressure loss.
- All joints (especially galvanized rigid ducts) must be airtight.
- Ducts should be insulated to prevent water condensation, corrosion, and energy loss.
- Sections of duct directly attached to the unit must have independent supports to avoid weight stress.
- The air inlet (if drawing air from outdoors) should be positioned high to avoid dust, debris, moisture, and toxic gases.
- The unit can be installed either in the space requiring dehumidification or in a separate technical room.
- The fan outlet should be equipped with a diffuser to ensure even air distribution.
Drain Pipe Connection
- Install a U-shaped pipe on the drain line to create an air trap, preventing backflow of air from the pipe into the unit, which could cause water overflow.
- The U-shaped pipe ensures proper drainage of condensate without leakage.
- Connect a 3/4-inch threaded pipe from the unit to the drainage system (floor drain or restroom).
- The drain pipe should be installed parallel to the floor surface.
External Sensor Connection
The unit supports connection to an external humidity control system via the provided signal cables.
Humidity Sensor Installation Guide
- Install at a height of 1–1.5 m above the floor.
- Do not place near heat sources, windows, water sources, or areas exposed to direct sunlight.
- Avoid abnormal airflows (such as from fans or air conditioners).
- Do not place the sensor in areas that are too dry or too humid to prevent measurement errors.
- The external control system must be compatible with the unit’s low-voltage control circuit.
- The fan outlet should still be equipped with a diffuser to ensure effective air distribution after adjustments.
Compliance Requirements
- Do not use flammable chemicals or spray water onto the unit.
- Do not place the unit in damp or flooded areas.
- Never operate the unit without the air filter installed. The absence of a filter may cause dirt or corrosion to the heat exchanger, reduce dehumidification performance, or result in complete unit failure.
- Do not remove or alter the labels and technical information on the unit.
- Use only genuine replacement parts designed and manufactured by Kosmen.
- Only personnel with appropriate expertise are allowed to operate and maintain the unit.
- Electrical components must be serviced only by certified electrical technicians.
- Do not install the unit in areas requiring explosion-proof equipment.
- Always disconnect the power supply before opening any maintenance panel.
- After stopping operation, allow the unit to cool for at least 15 minutes before performing maintenance.
- If maintenance is not being carried out, the maintenance panel must remain securely closed.
Humidity Control Rang
The unit operates effectively within a humidity range of up to 100% RH and an ambient temperature range of 5 to 38°C.
Error Code Explanation
Error Code | Error Description | Troubleshooting Solution |
E1 | Temperature sensor failure | Replace the sensor |
E2 | Humidity sensor failure | Replace the sensor |
E3 | Evaporator temperature sensor error | Replace the sensor |
E5 | Low voltage protection | Check refrigerant pressure |
E8 | Phase sequence protection or phase loss (for 380V only) | Reverse phase sequence |
Troubleshooting
Problem | Possible Cause | Solution |
Dehumidifier does not operate | 1. Power outage. 2. Power switch is not turned on. 3. Fuse is blown. 4. Timer setting has turned off the unit. 5. Water tank is full or improperly installed, water indicator light is flashing. | 1. Wait for power to be restored. 2. Turn on the power switch. 3. Replace the fuse. 4. Cancel or wait for the timer to finish. 5. Empty the water tank and reinstall it correctly. |
Dehumidification performance is insufficient | 1. Humidity setting is not appropriate. 2. Air inlet or outlet is blocked. 3. Insufficient operating time. 4. Doors or windows are open. 5. Ambient temperature is below 5℃ or above 38℃. | 1. Reset to an appropriate humidity level. 2. Clean and remove obstructions. 3. Extend operating time. 4. Keep doors and windows closed. 5. Operate within the 5–38℃ temperature range. |
Water leakage | 1. Drain hose is not securely connected. 2. Drain hose is clogged. 3. Water tank is not properly installed. | 1. Reconnect the drain hose securely. 2. Clean the drainage system. 3. Reinstall the water tank correctly. |
Excessive noise during operation | 1. Unit is not level. 2. Filter is dirty. 3. Some screws are loose. | 1. Re-level the unit. 2. Clean the filter. 3. Tighten loose screws. |
- When the above faults cannot be eliminated and maintenance is required, please contact Kosmen or the dealer, and do not disassemble the unit for maintenance without permission.
- When the dehumidifier is operating or stopped, you may hear the sound of the refrigeration cycle. This is a normal phenomenon, not a malfunction.
Kosmen KM-480DS Dehumidifier Specifications
Dehumidification Capacity | 480 liters/day (30℃ 80% RH) |
Power Supply | 380V~50Hz 3 Phase |
Power Consumption | 8400 W |
Airflow | 5600 m³/h |
Compressor | Panasonic |
Refrigerant | R410A |
Operating Area | 400 - 700 ㎡ (height 2.8m) |
Air Inlet Dimensions | 750 * 620 mm |
Air Outlet Dimensions | 1033 * 338 mm |
Noise Level | ≤ 68dB (A) |
Operating Environment | 5-38 ℃ 10% - 90% RH |
Product Dimensions | 1280 * 1220 * 715 mm |
Packing Dimensions | 1360 * 1290 * 880 mm |
Net Weight | 198 Kg |
Gross Weight | 230 Kg |
Origin/Place of Manufacture | China |
Share the article


Related news