Published: 24.03.2026
See moreUser Manual for Kosmen KM-180DS Ceiling-Mounted Dehumidifier
 Kosmen Tây Nguyên
 Published:
12/09/2025, 14:50
- Updated at 20/09/2025, 03:55
Published:
12/09/2025, 14:50
- Updated at 20/09/2025, 03:55Here is the user manual for Kosmen KM-180DS ceiling-mounted dehumidifier — check it out now!
Product Functions
Dehumidification
Helps control humidity in large spaces, prevents mold growth, and protects electronics, agricultural products, documents, and production materials. With a high dehumidification capacity of up to 180 liters per day, it is suitable for areas of 200–250 m².
Timer Function
Allows you to set automatic start and stop times, helping save energy and easily manage operation schedules.
Wi-Fi Connectivity
Connect the device to the “Tuya Smart” or “Smart Life” app for remote control, environmental humidity monitoring, and operation scheduling.
Automatic Defrost
When the sensor detects frost on the evaporator, the unit will automatically stop and initiate defrosting. Once defrosting is complete, the machine will restart automatically.
Memory Function
In the event of a power outage, the unit will automatically remember its most recent operating status and resume operation once power is restored. The device will continue running in the previous mode without requiring the user to reset it.
Note: Switch off the power when the unit is not in use to save energy and ensure safety.
Overload Protection
When an electrical overload is detected in the system, the unit will automatically shut down to protect the internal components and ensure safe operation.
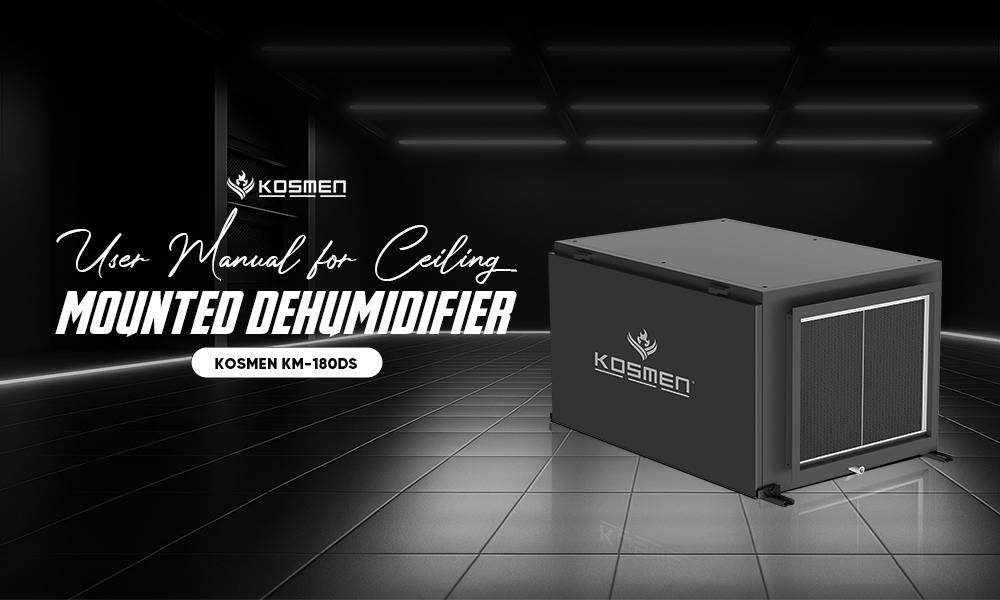
User Manual for Kosmen KM-180DS Ceiling-Mounted Dehumidifier
User Instructions
Control Instruction
Power Button
Press this button to turn the unit on or off.
Mode Button
When the unit is on, press this button to switch between two modes: Ventilation Mode and Dehumidification Mode.
Press and hold this button for 5 seconds to enter the clock setting mode. In this mode, each press of the Mode button will switch to the next setting in the following order:
- Clock icon displayed on the screen: Set the current hour and minute (use the Up/Down buttons to adjust).
- “On” icon displayed on the screen: Set the start time for the timer (use the Up/Down buttons to adjust).
- “Off” icon displayed on the screen: Set the stop time for the timer (use the Up/Down buttons to adjust).
If no operation is performed within 5 seconds, the device will automatically save the settings and exit the clock setting mode.
Increase Button (+)
Press this button to display or adjust the set humidity level. When in humidity setting mode or timer setting mode, use this button to increase the desired value.
Decrease Button (–)
When in humidity setting mode or timer setting mode, press this button to decrease the corresponding value.
Fan Speed Button
- Press this button while the unit is on to switch between High and Low fan speeds.
- Press and hold this button for 5 seconds to enter Wi-Fi configuration mode.
- In Wi-Fi mode, the unit will automatically search for available networks nearby.
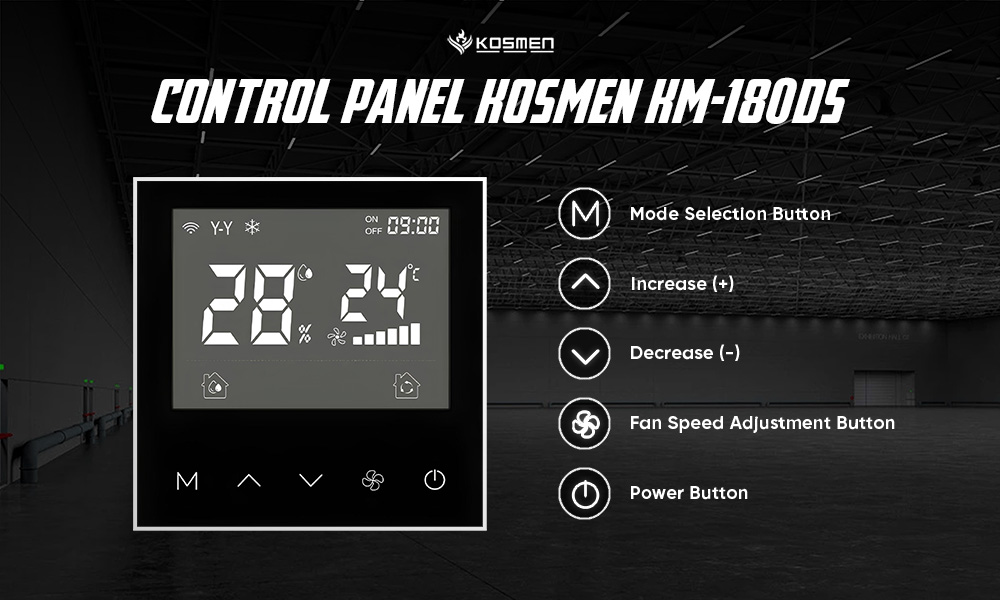
Control Pannel Ceiling-Mounted Dehumidifier Kosmen KM-180DS
Wi-Fi Connection
To control the unit remotely via smartphone, follow these steps:
- Download the “Tuya Smart” or “Smart Life” app on your phone.
- Log in or register a new account.
- Press and hold the Wi-Fi button on the unit for 5 seconds to enter pairing mode.
- Scan the QR code on the unit or search for the device in the app to connect.
- Notes:
- During setup, make sure the dehumidifier, smartphone, and router are placed close to each other.
- Ensure the Wi-Fi network is stable and available.
- Enter the correct Wi-Fi password.
- The device supports 2.4 GHz Wi-Fi only.
Operating Instructions
Ventilation Mode
When the ventilation mode is selected, the dehumidification icon will not be displayed on the screen. In this mode, the fan continues to operate normally while the compressor remains inactive.
Dehumidification Mode
- When the dehumidification mode is selected, the dehumidification icon will be displayed on the screen.
- If the ambient humidity is higher than or equal to the set level +2%, the compressor will start operating, and the “humidity percentage” indicator will remain on.
- If the ambient humidity is lower than the set level by 2% to 3%, the compressor will stop, while the fan continues to run and the “humidity percentage” indicator will flash.
- The fan always remains on after the unit starts to ensure continuous air circulation.
Automatic Defrost Function
- When the compressor operates continuously for 25 minutes and the coil temperature drops to ≤ -1°C (for at least 30 seconds), the unit will automatically switch to defrost mode.
- During defrosting, the compressor will temporarily stop, but the fan will continue running. The “defrost” indicator light will appear on the display.
- When the defrosting duration reaches 8 minutes or the coil temperature rises to ≥ 7°C (for at least 30 seconds), the unit will exit defrost mode and return to normal dehumidification operation. At this point, the “defrost” indicator will turn off.
- In the case of a faulty coil, the unit may operate for 25 minutes and then enter an 8-minute defrost cycle repeatedly.
Memory Function
- In the event of a power outage, the unit will automatically save the last operating mode and settings.
- Once power is restored, the dehumidifier will resume operation with the previous settings without requiring the user to reconfigure.
Maintenance Instructions
Filter Maintenance
The dehumidifier is equipped with a separate filter, installed at the air inlet of the unit. This filter helps clean the air before it enters the machine, thereby improving the device’s performance.
Do not operate the dehumidifier without the filter. Lack of a filter will cause:
- Dust and impurities to enter the unit.
- Reduced dehumidification efficiency.
- The compressor frequently activate the defrost mode, affecting the lifespan and performance of the unit.
The frequency of inspection, cleaning, or replacement of the filter depends on the air quality at the installation site. However, to ensure stable and efficient operation, the filter should be checked at least once a month.
Motor Maintenance
The motor is equipped with bearings, which provide lubrication for both the bearings and the motor. Therefore, no additional maintenance is required. The motor should be inspected once a year to ensure normal operation.
Regular inspection and maintenance
Components | Inspection and Maintenance | |
3–6 months | 12 months | |
Filter | Clean the filter and replace it if it is dirty. | |
Compressor | Check whether the compressor is operating normally and whether the vibration is within the normal range. | Inspect the compressor wiring system to ensure it is not loose, and check for signs of damage and overheating. |
Condenser | Clean debris and dust from the surface and bottom of the heat exchanger | |
Defrost Valve | Check for signs of overheating and blockage. Replace if any damage is detected. | |
Seal | Check for signs of damage and displacement. Replace if any damage is found. | Check for signs of wear and displacement. Replace if any wear is detected. |
Some Important Notes
Installation Notes
Choosing the Installation Location
- Install indoors to optimize operational efficiency and minimize potential issues.
- Leave maintenance space behind the unit to facilitate periodic inspections and repairs.
- Ensure a compact and reasonable surrounding area for easy cleaning and upkeep.
- Avoid placing the unit in locations with temperatures below the dew point to prevent internal condensation.
- Install near a power outlet in an easily accessible location for safety and convenience.
- Never block the unit or cover the air vents, as this can affect airflow and dehumidification performance.
Installation Clearance
- Ensure a minimum distance of 1 meter on all sides between the unit and walls or surrounding objects.
- Maintain proper airflow to ensure stable and efficient operation.
- Reduce the risk of overheating, protecting the internal components of the unit.
- Optimize dehumidification performance and extend the equipment’s lifespan during continuous operation.
Basic Installation Requirements
The dehumidifier must be installed on a level surface. Please use a measuring tool to ensure the unit is horizontally aligned after installation.
Avoid tilting or uneven placement, as this may cause:
- Condensate water to accumulate and not drain properly.
- Water leakage, affecting both the unit and the surrounding environment.
- Reduced performance and potential damage to internal components.
Air Duct Connection
- The air duct must comply with ISO 7807 standards for size and technical design.
- The bolt length for installing the elbow flange must not exceed 20 mm.
- When installed correctly: Air is drawn from the center of the room, then dehumidified and evenly distributed to individual areas such as bedrooms or offices.
- Minimize duct length to reduce static pressure loss and optimize dehumidification efficiency.
- All rigid duct connections (e.g., galvanized pipes) must be airtight to prevent air leakage.
- The air duct must be insulated to: Prevent condensation on the duct walls, avoid pipe corrosion, and reduce energy loss.
- The duct directly connected to the dehumidifier must have its own support to prevent load and vibration on the device.
- If drawing air from outside: The intake grille should be installed above ground to avoid dust and debris. Keep away from pollution sources such as exhaust, steam, or harmful gases.
- The dehumidifier can be installed in the room to be dehumidified or in a separate room.
- To ensure optimal dehumidification, the fan outlet should be equipped with a diffuser.
Water Pipe Connection
- Install a U-shaped pipe section on the dehumidifier’s drain line.
- The U-shaped pipe prevents air from the drain line from flowing back into the unit.
- Backflow of air can obstruct drainage and cause water overflow.
- The U-pipe creates a negative pressure barrier, allowing water to flow smoothly from the tray into the drain line.
- Ensure the U-pipe is installed parallel to the ground for a stable water flow.
- Use a 3/4-inch threaded connector to connect to the floor drainage system.
- Connect the drain line to a floor drain or toilet to safely discharge the water.
Electrical Connection
- Electrical wires are color-coded to avoid confusion during installation.
- The unit operates on single-phase AC power, with the voltage and frequency specified on the machine.
- Do not operate the machine outside the allowed voltage and frequency range.
- Before connecting, ensure the voltage does not fluctuate more than ±10% of the rated value.
- This check is especially important if the system has large-load equipment that may cause voltage drops.
- The unit must be properly grounded to ensure safety.
- An isolation switch should be installed for convenient inspection and maintenance.
- The power supply must provide sufficient capacity for the installed equipment.
- A fuse should be installed near the machine to protect against faults.
- The power cord and fuse must match the dehumidifier’s power rating.
- The fan outlet should be equipped with a diffuser to optimize dehumidification efficiency.
Note: Electrical connections must be performed by qualified personnel in accordance with the electrical standards of the ceiling-mounted installation location.
External Sensor Connection
When installing the humidity detection unit, its placement must comply with the following requirements:
- Do not install the control panel near windows, water sources, or areas with unusual humidity fluctuations.
- The humidity detection unit should be placed at a height of 1 – 1.5 meters from the floor.
- Prefer locations that can accurately represent the humidity of the controlled area.
- Avoid installation in areas affected by dry or humid air, or sudden airflows.
- Do not place near heat-emitting devices or in direct sunlight.
- The external control system must be compatible with the low-voltage control circuit of the unit.
- The fan outlet should be equipped with a diffuser to ensure optimal dehumidification performance.
Note: The dehumidifier can be pre-positioned for connection to the external control system, with provided wires for integration with the external control system.
Usage Notes
To maximize the operational efficiency of the Kosmen KM-180DS ceiling-mounted dehumidifier, save energy during operation, and ensure long-term durability, please take note of the following:
Set Appropriate Humidity According to Usage
Depending on your specific storage or operational needs, you should set the dehumidifier’s humidity level and operating time accordingly. In manufacturing and storage, each type of raw material or finished product requires a specific humidity environment to ensure quality. Some reference humidity levels include:
- Textile storage: 40% – 60% humidity
- Pharmaceutical storage: 40% – 60% humidity
- Electronic components storage: 60% humidity
- Documents and paper storage: 50% humidity
- Alcoholic beverages storage: 50% – 70% humidity
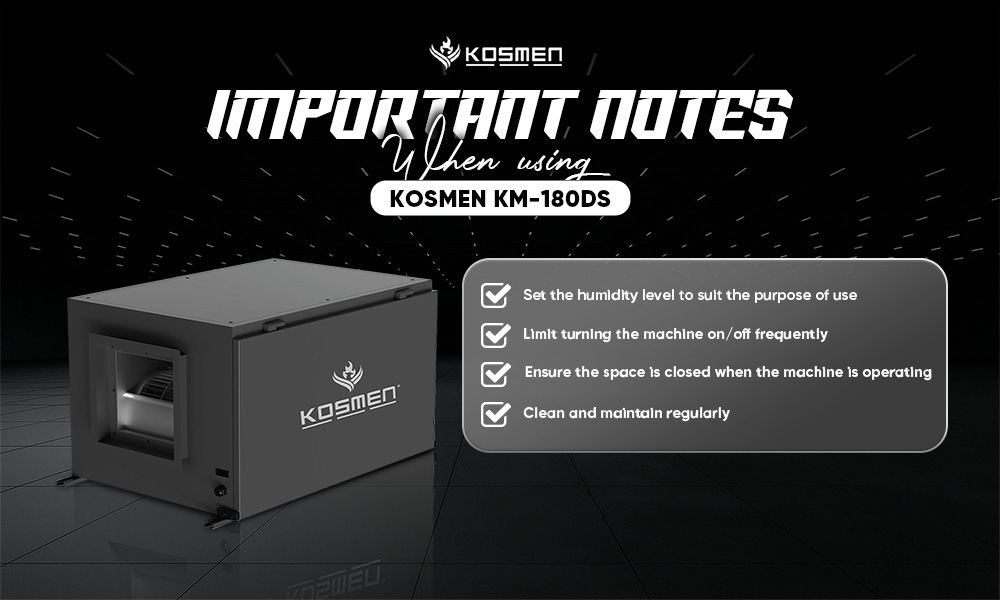
Important Notes When Using Ceiling-Mounted Dehumidifier Kosmen KM-180DS
Avoid Frequent On/Off Cycling
Starting and stopping the dehumidifier repeatedly within a short period can cause overloads or short circuits, reducing the lifespan of the device. Additionally, do not cut off the power while the machine is still running. Wait approximately 3–5 minutes after the machine has completely stopped before unplugging it to ensure the safety of the system.
Ensure a Closed Space During Operation
Before turning on the dehumidifier, make sure all doors in the area are fully closed. Avoid opening doors while the machine is running, as this can cause sudden changes in humidity, forcing the device to work continuously at high capacity to remove excess moisture. This not only increases energy consumption but also affects dehumidification efficiency. Therefore, limit movement in and out of the area while the machine is operating to maintain a stable environment.
Regular Cleaning and Maintenance
Over time, dust in the air will accumulate on the filter, affecting the machine’s dehumidifying and dust-filtering performance. Depending on the level of usage, the cleaning frequency may vary; however, it is recommended to clean the machine and its filters at least every 2 months to ensure optimal performance.
Since the ceiling-mounted unit is installed at a height, cleaning it yourself may be difficult. In this case, you should contact the supplier for safe and professional cleaning and maintenance support.
Product Error Code Table
Error Code | Fault Description | Handling Method |
E1 | Temperature sensor malfunction | Replace the sensor |
E2 | Humidity sensor failure | Replace the sensor |
E4 | Low voltage protection | Check refrigerant pressure |
E6 | Phase sequence protection or phase loss (For 380V only) | Swap phase sequence |
Troubleshooting
Issue | Cause | Solution |
Dehumidifier Not Operating | 1. There may be a power outage. 2. The power switch has not been turned on. 3. The fuse may be blown. 4. The timer was set to turn off the machine previously. 5. The water tank may be full or not properly secured, and the “Full Water” indicator on the display is blinking. | 1. Please wait for the power to be restored. 2. Turn on the power switch. 3. Replace the fuse. 4. Wait or cancel the timer setting. 5. Empty the water tank, then reinstall it. |
Dehumidification Efficiency Not Meeting Requirements | 1. Humidity setting is not appropriate. 2. The front and back of the dehumidifier may be blocked. 4. Doors and windows may be open. 5. Indoor temperature is below 5℃ or above 38℃. | 1. Set the appropriate humidity level. 2. Clean and remove any obstacles. 3. Continue to wait. 4. Close doors and windows. 5. Please operate the machine at a temperature of 5 - 38℃. |
Water leakage | 1. Loose sewer connection. | 1. Reconnect the sewer. |
High noise | 1. The machine is not leveled horizontally. 2. The filter is clogged with dust. | 1. Level the machine horizontally. 2. Clean the filter. 3. Tighten the screws. |
Technical Specifications
Dehumidification Capacity | 180 liters/day (30℃, 80% RH) |
Power Supply | 220V ~ 50Hz, Single Phase |
Power Consumption | 2540 W |
Airflow | 2000 m³/h |
Compressor | Panasonic |
Refrigerant | R410A |
Operating Area | 200 - 250 m² |
Air Inlet Size | 500 * 430 mm |
Air Outlet Size | 332 * 323 mm |
Operating Environment | 5 - 38℃ 10% - 90% RH |
Product Dimensions | 1000 * 621 * 520 mm |
Packing Dimensions | 1050 * 670 * 650mm |
Net Weight | 68 kg |
Gross Weight | 87 kg |
Origin/Manufacture | China |
Contact Support:
- Head Office: No. 27B, Street 12, Hiep Binh Ward, Ho Chi Minh City
- Hanoi Office: No. NV4.7, Cau Buou New Urban Area, Thanh Liet Ward, Hanoi City
- Da Nang Office: No. 41, Vo An Ninh Street, Hoa Xuan Ward, Da Nang City
- Da Lat Office: No. 38/7, Ba Thang Hai Alley, Xuan Huong Ward, Da Lat, Lam Dong Province
- Hotline: 0766 899 799 (North) - 0965 210 874 (South) - 0961 061 076 (Central Highlands) - 0935 696 695 (Central)
- Website: kosmen.com.vn
Share the article


Related news